Todos os cursos


Rehlko/ Kohler Muffler Installation
Video Transcript
[00:00] Intro: Mounting a muffler on a horizontal shaft Kohler twin-cylinder engine.
[00:06] Importance of the support bracket sequence to avoid premature failure.
[00:30] Demonstration of starting the bolts for the support bracket, keeping them loose to allow movement.
[01:04] Common mistake: Tightening the bracket first, which pulls down on the muffler and causes flange breakage.
[01:27] The trick: Use a boxed-in wrench to tighten the bracket after the muffler is in place.
[01:48] Mounting the muffler to the engine.
[01:55] Step 1: Fully tighten the four nuts holding the muffler to the engine first.
[02:26] Step 2: Place the bracket and start the two bottom bolts finger-tight.
[02:44] Step 3: Use a 10mm wrench to snug up the bracket bolts against the engine block.
[03:02] Crucial step: Never tighten one bolt fully at once; draw everything up evenly to avoid putting pressure on the muffler.
[03:34] Summary: Plate up loosely, mount muffler, snug bracket to block, then finish with lower mounting bolts.
Quiz

20 advanced questions expand your knowledge in the Accessory Catalog Quiz.
Basic Engine Electrical Systems 101
Introduction to Electrical Theory
Fundamental Principles 00:52 Opens in a new window : The video begins by explaining the basic nature of electricity as the flow of electrons through a conductor.
Voltage, Amperage, and Resistance 01:25 Opens in a new window : It defines these three key terms using a water-flow analogy: voltage is pressure, amperage is the amount of flow, and resistance is the restriction to that flow.
Ohm's Law 02:45 Opens in a new window : The mathematical relationship between these three properties is introduced, explaining how technicians use it to troubleshoot circuits.
Engine Components and Systems
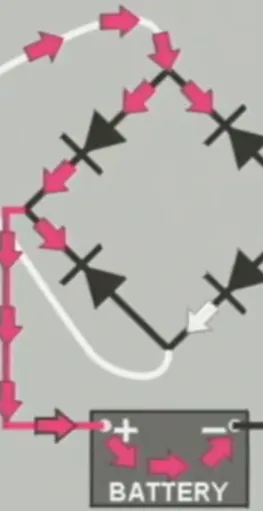
The Battery 04:15 Opens in a new window : This section covers the chemical process of storing electrical energy and the importance of proper maintenance to prevent corrosion and ensure strong starts.
The Ignition System 07:30 Opens in a new window : Detailed explanations are provided for both magneto and battery-powered ignition systems, describing how they generate the high-voltage spark necessary for combustion.
Charging Systems 15:20 Opens in a new window : The video explores how alternators and rectifiers work together to recharge the battery and power the engine's electrical accessories while it's running.
Testing and Maintenance
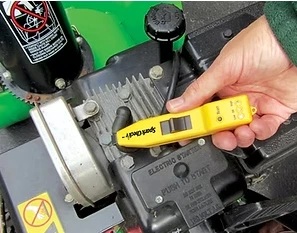
Using a Multimeter 22:10 Opens in a new window : A guide on how to use a multimeter to measure voltage drops and test for continuity within various engine circuits.
Common Electrical Failures 28:45 Opens in a new window : Identification of typical problems such as blown fuses, failed solenoids, and grounded wires that prevent engines from starting or running correctly.
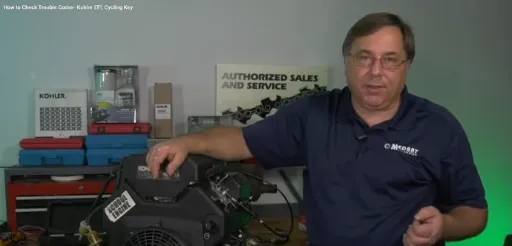
How to Check Trouble Codes- Kohler EFI, Cycling Key

How to Check a Flywheel
Video Summary Transcript
The video explains the importance of ignition timing and how to properly inspect a flywheel key for shearing:
Ignition Timing Basics: Correct timing requires the spark plug to fire at the exact moment the piston approaches Top Dead Center (TDC) on the compression stroke [00:13].
Flywheel Components: Engines typically use a magnet on the flywheel and ignition coils (or a speed sensor for EFI engines) to determine when to fire [00:23].
Causes of Sheared Keys: Keys can shear if fasteners aren't torqued properly, if the engine hydraulically locks due to fuel, or if a lawnmower blade hits a solid object like a stump [01:16].
Inspection Myths: Simply looking down the keyway after removing the fastener is often insufficient [02:19]. Small nicks or shifts in the key can significantly advance or retard the timing [03:31].
The Proper Test: For "Half Moon" (Woodruff) keys, the only way to truly verify if it is sheared is to remove the flywheel using a puller, take the key out, and place it on a flat surface to see if it rocks or "teeters" [02:59].
Timing Alignment: While some engines allow you to check alignment by comparing the crankshaft keyway to the flywheel keyway at TDC, the physical removal and inspection of the key is the most reliable method [05:03].