Technical Guide: Field Procedure for Shortening and Rethreading Crankshafts
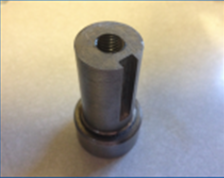
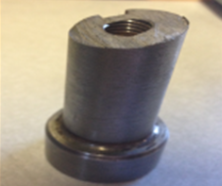
Shortening a crankshaft is often viewed with hesitation by technicians who fear compromising the structural integrity or alignment of the PTO end. However, because many crankshafts (such as those from Kohler/Rehlko) utilize cast iron construction that is not heat-treated at the PTO end, the modification can be performed accurately using standard shop hand tools.
The following procedure ensures the factory center is maintained and the cut is square without the need for specialized machine shop services.
 |  |
Required Tooling
Drill & Bits: Sized appropriately for the required internal thread.
Tap: Matching the original thread pitch and diameter.
Hacksaw: With a high-quality bi-metal blade.
Guide Hubs: A pulley or hub that fits the crankshaft diameter snugly.
Measurement Tools: Tape (for depth marking) and a fine-tooth file.
Step 1: Preparing Internal Threads
If the application requires internal threading, these must be established prior to cutting to ensure the new threads are concentric with the original bore.
Pilot Drilling: Use the original threaded hole as a pilot. Select a drill bit that matches the minor diameter of your required thread.
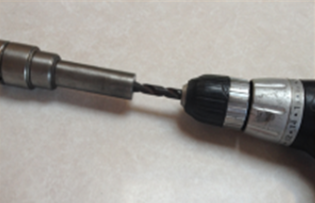
Depth Indexing: Determine the final length of the crank. Insert the drill bit into the original hole until it bottoms out. Apply a piece of tape to the bit at a distance from the crank end equal to the amount of material being removed.
Boring: Drill to the tape line to ensure the new hole depth accounts for the material loss.
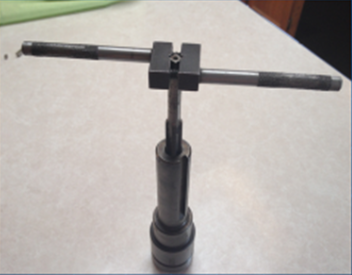
Tapping: Using the original threads as a guide, tap the newly drilled section. This method guarantees that the thread pitch and alignment remain consistent with the factory output.
Step 2: Executing the Square Cut
Achieving a perfectly perpendicular cut is critical for the seating of pulleys or clutches.
Setting the Guide: Slide a hub or pulley onto the crankshaft. Position it on the engine side of the cut line (the portion of the crank you are keeping). Secure it firmly.
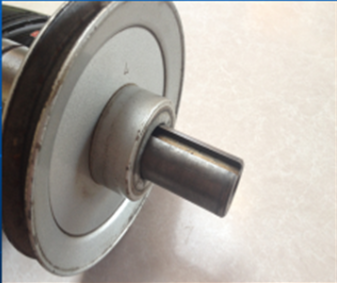
Optional Dual-Guide Method: For maximum precision, place a second hub on the "scrap" side of the crank, leaving a gap exactly the width of your hacksaw blade between the two hubs.
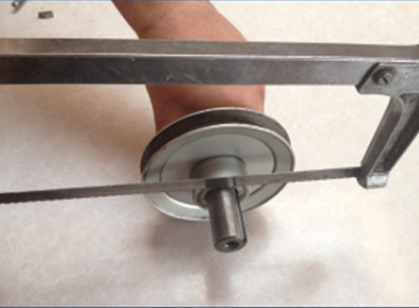
The Cut: Use the hub faces as a mechanical guide for the hacksaw blade. The physical barrier of the hub prevents the blade from wandering, ensuring a professional, straight finish.
Step 3: Finishing
Deburring: Once the excess material is removed, use a fine-tooth file to dress the edges of the cut.
Beveling: Create a slight 45-degree chamfer on the leading edge of the crank to facilitate easier installation of hubs, pulleys, or bearings.
Technical Note: Remember that while the PTO end is workable, the bearing journals are typically induction-hardened. Avoid any grinding or cutting near the bearing surfaces to prevent fracturing or premature seal wear.
Quiz: Crankshaft Shortening & Rethreading Procedures
1. Why is it possible to drill and tap the PTO end of a Kohler/Rehlko crankshaft using standard shop hand tools?
[ ] The entire crankshaft is made of soft aluminum.
[ ] The PTO end is made of cast iron and is not heat-treated.
[ ] The factory uses a special coating that softens when heated by a drill bit.
[ ] Modern crankshafts are hollow at the tip to allow for easy modifications.
2. When modifying a crankshaft that requires internal threads, what is the correct sequence of operations?
[ ] Cut the crankshaft to length, then drill and tap the new face.
[ ] Drill and tap the new threads before cutting the crankshaft.
[ ] Cut the crankshaft, then weld a threaded nut to the end.
[ ] Internal threads cannot be maintained if the crank is shortened.
3. What is the purpose of placing a piece of tape on the drill bit during the boring process?
[ ] To clean debris out of the hole as you drill.
[ ] To prevent the drill bit from overheating.
[ ] To mark the required depth, ensuring the new hole accounts for the material being removed.
[ ] To provide better grip for the drill chuck.
4. How is a "square" (perpendicular) cut achieved when using a hacksaw?
[ ] By cutting as fast as possible to maintain momentum.
[ ] By using a laser level attached to the hacksaw frame.
[ ] By using a hub or pulley secured to the crankshaft as a mechanical guide.
[ ] By eye-balling the cut and fixing it later with a bench grinder.
5. If using the "Dual-Guide" method for cutting, where should the gap between the two hubs be located?
[ ] Exactly the width of the hacksaw blade at the cut line.
[ ] 1/2 inch wider than the blade to allow for movement.
[ ] On the bearing journal to ensure alignment.
[ ] There should be no gap; the hubs should touch.
6. Which area of the crankshaft should you AVOID grinding or cutting to prevent structural failure?
[ ] The very tip of the PTO end.
[ ] The internal threaded bore.
[ ] The induction-hardened bearing journals.
[ ] The keyway slot.
7. What is the final step recommended after the cut is completed and the hubs are removed?
[ ] Painting the end of the crank to prevent rust.
[ ] Filing a 45-degree chamfer (bevel) on the leading edge.
[ ] Hammering the end to mushroom the metal for a tighter fit.
[ ] Immediately torquing the bolt to 50 ft-lbs to test the threads.
Answer Key
The PTO end is made of cast iron and is not heat-treated.
Drill and tap the new threads before cutting the crankshaft.
To mark the required depth, ensuring the new hole accounts for the material being removed.
By using a hub or pulley secured to the crankshaft as a mechanical guide.
Exactly the width of the hacksaw blade at the cut line.
The induction-hardened bearing journals.
Filing a 45-degree chamfer (bevel) on the leading edge.